Saturday, November 15, 2008
Photoshop Water effect on products Photoshop tutorial Tutorial
After that "scale down" and "position" the water layer to the product like the first picture shows below. The second picture is a zoom view. I have used the "Rectangular marquee tool" and used it on the "water layer!" but the width and the height is applied to the bottle since this is going to be blurry because i want the water splat too be behind the bottle. Use the "Layer via cut" option when right clicking.
On the new made layer, change the blending again to "Screen" and then go to Filter -> Blur -> Gaussion blur and blur the image. I have used the setting of around 3px. Clean the image a bit so it really does look like it is behind the bottle.
On the same layer, add mask to it and use the "Gradient tool" from left to right to make the ilussion perfect. Right click on the layer and use the "Free transforma". Again right-click and choose "Warp". Do a similar warp transofmation like the second picture below, apply when done. This will give the layer the look like viewing something through the bottle.
Duplicate the hidden water layer and make it visible, rotate it and scale it down like the first picture below and place it in the right position like the second picture shows. Try to really use the water and blend it with the object/product you are working on. Try to experiment with different shapes. Use a soft eraser and erase the left part that is too big.
The next step will be to delete the bottom right part of the bottle and break it’s shape. There is now a line that needs to be deleted (the first picture below). Mak a new layer and use a "white soft brush" and make the hole in the bottle like the second picture shows. After that, just hit "CTRL+I" to invert it to black. You can skip the white brush step though, i just did it like this to show you where i used the brush since you can’t see it in detail when you use black color on black.
The next step will be adding more water so again duplicate the original hidden water layer and use the "Eraser" to delete the unneeded parts like the second picture shows. I hided the other layers to easily see the whole water layer.
Make the other layers visible again (first picture). Duplicate it 3 times and make it a half circle that will fit the half-circeled lower part of the bottle. After that you will need to clean it. Use the eraser for that on the lover layers.
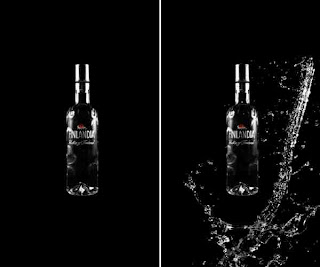
And you’re done. Play with it and use your own creativity to make it eben better. Here’s the final image:
Friday, November 14, 2008
Pop Art Photo
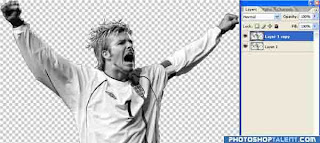
That is an image that I use for this tutorial.
CRTL+J to make a copy of the layer, just in case you (or I) bugger it up. SHIFT+CRTL+U to desaturate it. We're going to color it ourselves:
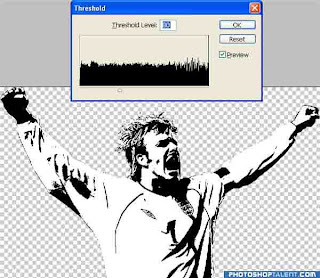
Go Image->Adjustments->Equalize, then Image->Adjustments->Threshold:
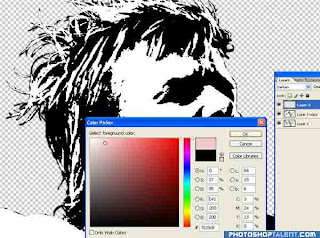
Make a new layer and change the blend mode to darken. Click the Foreground color palette and choose a tacky pinky color.
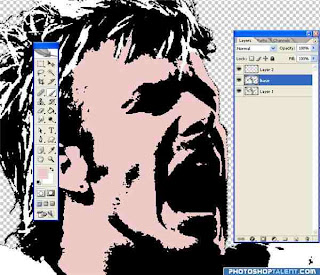
CRTL+Click the base layer to select it then paint on the new layer. We've got the base layer selected to aid us painting. See, now we can't go off his face (but we do have to be careful
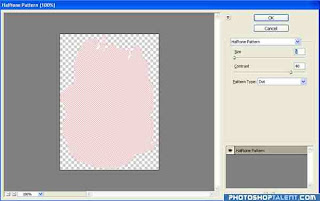
now go Filter->Sketch-Halftone pattern:
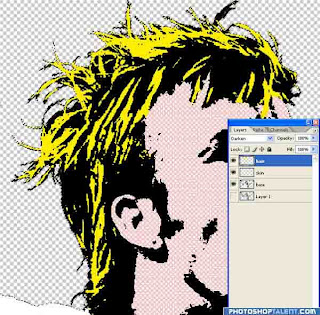
Do his hands while you're at it too. Make a new layer, choose a yellow, and do the same with his hair:
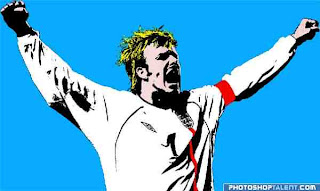
Create another new layer and call it background (or 'dog' if you want). Fill it (SHIFT+F5) with a nice bright blue:
Hide all the layers except the original and use the pen tool to make the selections. Then CRTL+Click the path to select it and fill with red:
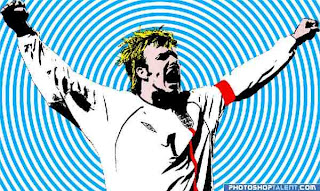
Go back to the blue background layer. Click the eyedropper tool 'I' and click the blue background so this is the Foreground color. Go Filter->Sketch->Halftone pattern again. This time though, choose circle:
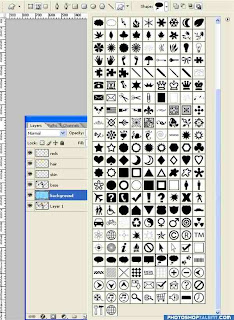
The last job to do is make a thought? bubble. SHIFT+U to cycle through the shape tools until you get to the 'Custom Shape Tool'. You'll see a wholeload of custom shapes from the drop down list:
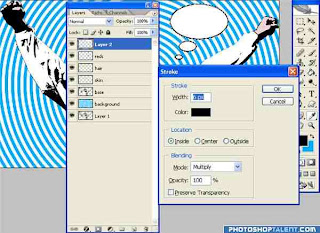
SHIFT+Drag to keep the ratio. That done, go to the paths panel and there it is. CRTL+Click it to make a selection, make a new layer in the layers panel and fill with white. Then go Edit->Stroke and choose black:
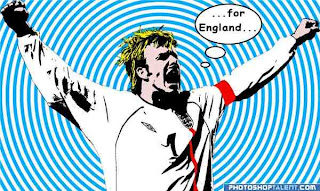
Now all you need do is fill it with some text. Comic Sans works well. And that's all there is to it; drug free pop art:
Creating a Custom Stencil using Adobe Photoshop
Step 1: Select an Image you want to make a stencil of and Open it in Photoshop. For a good stencil, make sure that the picture is high resolution and that there are clear shadows and highlights. We can see Dick has sharp shadows around his nose, mouth and eye areas.
Step 2: Cut out all of the Background. I just use the Brush tool and paint the background all white.Step 3: Pick out areas that are light, that you want to be seen in the stencil...then color them black. When we start adjusting the Brightness/Contrast Dick's hair will just dissapear because it's white. This is an important feature for his face so I'm coloring it in black. Later in the tutorial I have to go back and add in some of his cheek lines because they are too light.
This is also a good time to mention that you should create a new layer when adding the black onto a photograph...that way it's easier to go back if you mess up. When you're done you can merge the layers (Ctrl +E).
There, I've finished the darkening of his hair.
Step 4: Adjust the Brightness/Contrast. Go to Image>Adjust>Brightness/Contrast.
We can almost start to see what the stencil is going to look like when we adjust the Brightness and Contrast of the image. Play with these controls and try to clearly define the light and dark images of the picture.
Step 5: Change the Image Mode to Greyscale. Since our stencil will be black and white, now's a good time to get it there. Go to Image>Mode>Greyscale. If Adobe Photoshop asks you to Flatten the image, select "Flatten"
Step 6: Re-Adjust the Brightness/Contrast. You're probably getting pretty good with this tool now. Play with it more and get your image as close as you can to Stencil-Ready.
I needed just one more Adjustment...this time setting the Brightness at %100 and the Contrast at %100. Note: before you start fine toning your image, you need to make sure that you've adjusted the Contrast all the way to %100 at least once.
Step 7: The most important Step. Fine Tuning and Preparing the Stencil Image. This step takes time too. You will be alternating between black brushes and white brushes to clean up the image. The Area inside the red box has not been touched up yet. The red arrows point to little windows I made in the image. These are important because whenever you actually cut out the stencil, these little windows make the stencil much stronger and sturdier. Add them where ever you can without compromising the design of the stencil. Also, make sure that there are not "Islands of White" surrounded by a "Sea of Black". Notice on the touched up part that the white can flow everywhere. On the non-touched up box you can see that there are a few "White Islands" in the eye and around the glasses frame...these need to be touched up or filled in.
As I completed tuning up the stencil I made sure to have lots of windows to allow the white to flow well through out the stencil. The Red Arrows point out some of the key changes I made.
Step 8: Finding the Edges. Now after all that back breaking work our stencil is finally complete. You can just print it out or prepare it with edges to save your printer's ink. Go to Filter>Stylize>Find Edges. Adobe Photoshop will automatically create the edges for you. Also, this is the point where I added a few cheek lines before I created the edges.
There you have it, A Custom Stencil made by your, ready to print (Just make sure your image size will fit on an 8.5"x11" paper. Image>Image Size